Most affiliate operators chase “best of” roundups and single-product reviews. The data tells a different story. Product comparison posts sit at the bottom of the buying funnel with some of the highest conversion rates on any affiliate site, yet most publishers write them like spec sheets and wonder why EPC stays flat.
I have been running affiliate sites for over nine years. Comparison articles have earned me tens of thousands of dollars across my own properties. The pattern is consistent. A reader searching “Product A vs Product B” has already done the research. They want a clear verdict from someone who understands the tradeoffs. Give them that, and you convert. Give them a vague tie, and they bounce back to Google.
This guide walks through the six-step formula I use for high-converting product comparisons: title, intro, call-to-action, in-depth feature comparison, alternatives, and conclusion. We will cover structure, segmentation, research, and the conversion mechanics that separate comparison posts that rank from comparison posts that pay.
Updated 2026.
Here is the formula for writing high-converting product comparisons:
-
Title
-
Intro and value judgment
-
Call-to-action
-
In-depth feature comparison
-
Alternatives (optional)
-
Conclusion and second CTA

1What Is a Product Comparison?
A product comparison compares two products (or sometimes more) over a range of features, giving the reader the information they need to decide which to buy.
The best product comparisons also show the buyer the different factors, use cases, and evaluate which is the best in each category, and for which audience segment each is best for.
Product comparisons are used in both SEO content affiliate marketing to convert affiliate sales, as well as by e-commerce stores to compare specs and sell products.
Product comparison articles are also sometimes known as:
-
X vs Y articles
-
VS articles
-
Which is better
-
The difference between X and Y

Example product comparison keywords include:
-
samsung s21 vs iphone 12
-
macbook m1 vs m2
-
tweet hunter vs hypefury
-
shark vs dyson steam mop
-
blue snowball vs yeti
-
traeger vs weber
For operators building at scale, these keywords are infrastructure. They capture demand that single-product reviews miss and that broad “best of” lists often cannot rank for. The reader already narrowed their options. Your job is to close the decision loop.
2Why Should You Write Product Comparison Posts?
You should write product comparison posts because they are some of the highest-converting content types, as they are right at the bottom of the funnel.
Yet, they are far easier to rank for than single product “review” keywords, and buyer’s guide “best” keywords as they are much less competitive.
As a result, even smaller affiliate sites and e-commerce stores can rank for these, and convert a high percentage of visitors into buyers.
Any potential customer who searches for a product comparison article has passed through the exploration stage, past evaluating a variety of products, and now wants to know specifics about two competing products to decide on a final purchase.

This is the highest possible buyer intent, and if you write these well, and understand your audience, you should convert the vast majority of visitors into affiliate clicks.
We have seen this pattern across Lasso customers running comparison-heavy content strategies. The bottleneck is rarely traffic on vs. keywords. It is whether the page gives a confident, segmented verdict early enough that the reader clicks before they scroll away. Comparison posts that front-load the answer and back it up with spec-by-spec evidence outperform pages that save the verdict for the conclusion.
For a structured review format that pairs well with comparison content, steal our simple product review template.
3How to Write a Product Comparison: Step-by-Step
This is how I write product comparison posts for two products, that have earned me tens of thousands of dollars:
Step #1: The Title
There are two main reasons to optimize and tweak your titles:
-
To increase CTR (click-through rate)
-
To get the main keyword in the title for SEO
The main reason is to get the click, and to do this you need to understand the exact pain point in the reader’s mind when they search.
Think carefully about this. For example, if you can understand that in typing a certain product comparison keyword, they are looking for a reliable product, then you can title it:
-
“X vs Y: Which is the most reliable?”
-
Or even “X vs Y: I found out which is most reliable”
This both plays off their worries (buying an unreliable product), and gives them confidence that because you can articulate their problem, that you can solve it.
For example, if I was writing a comparison about the Macbook M1 and M2, and hypothetically let’s say most people wanted to use it for graphic design, then I could both hit the keyword in title, and try to garner clicks with a title like:
- “Macbook M1 vs M2 Compared: Tested for graphic designers”
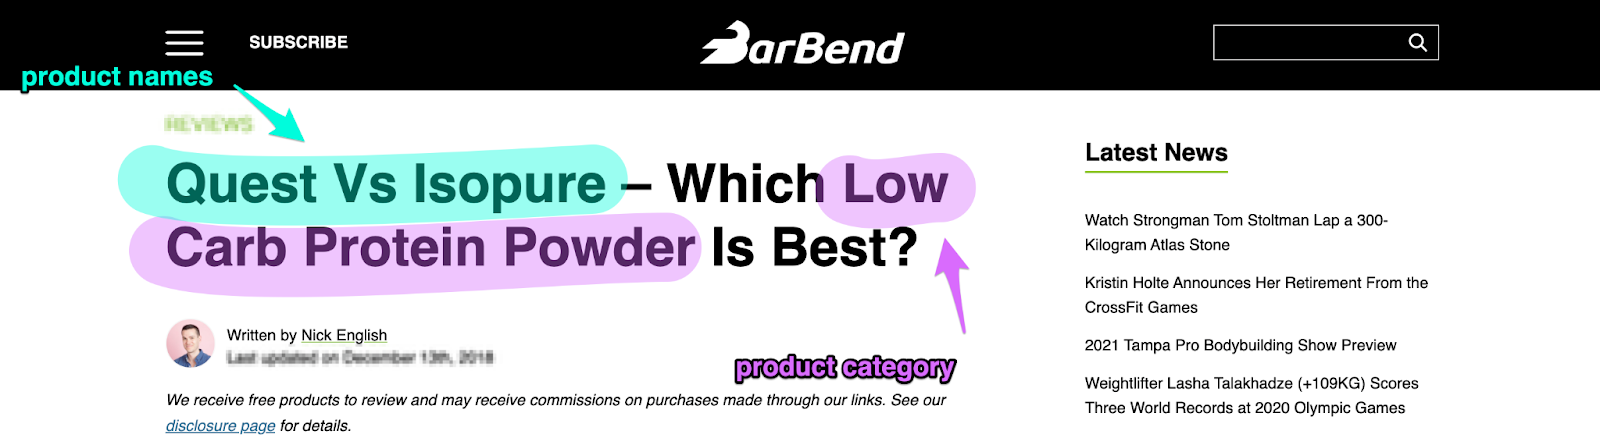
Here is an example of a fitness site writing about protein powder:
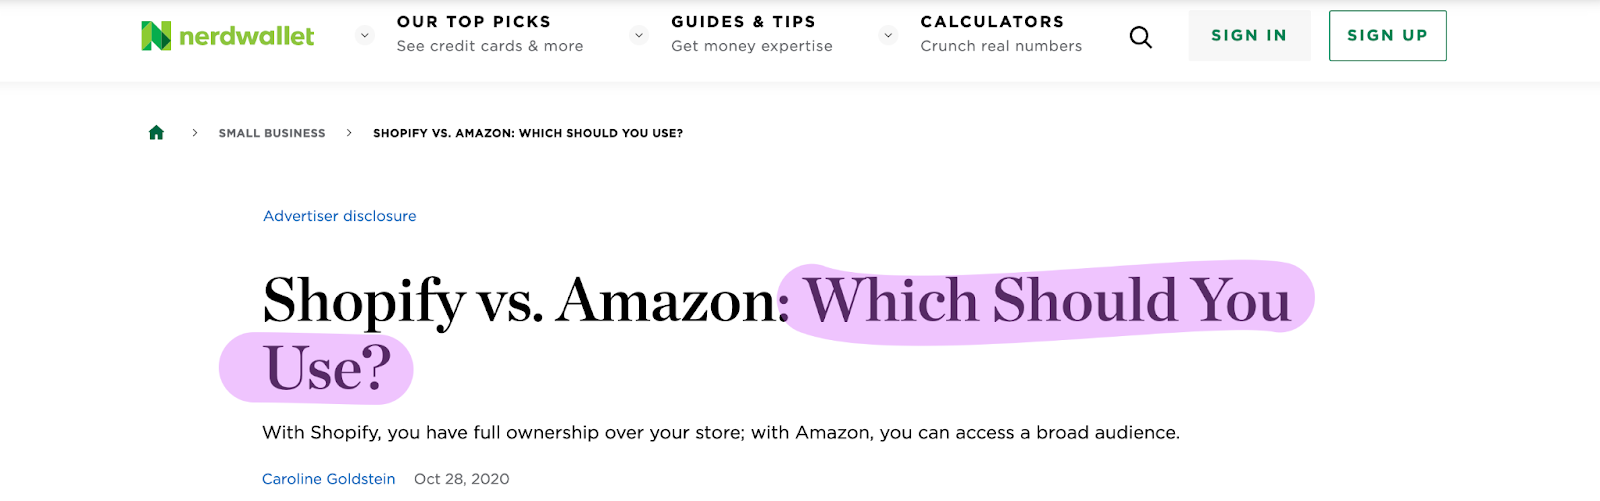
Alternatively, you could ask a question in the second part of your headline.
For example, NerdWallet asks the reader, “Which should you use?” with its Shopify vs. Amazon comparison.
The title is your first segmentation signal. It tells Google what keyword you target and tells the reader you understand why they searched. For operators, this is not cosmetic. CTR and relevance compound over time. A title that names both products, includes the vs. pattern, and hints at the decision criterion outperforms generic “X vs Y: Full Comparison” headlines on competitive SERPs.
Step #2: The Intro
The introduction of an article comparing two products is absolutely crucial to the success of your content, and how much
I have previously estimated that 40-50% of your sales come from your intro and first CTA, and I stand by that today. But, do not waste your audience’s time with fluffy intros that do not make them more confident in buying. Get right to the point.
I wrote the SPEAR framework for intros that convert and build trust. Search intent, pain points, expertise, audience, rapport. Each element maps to a job in the first three paragraphs. We published a full walkthrough in our SPEAR framework guide. Use it when you are stuck on openings that rank but do not click.
But, also do not neglect SEO: make sure the keyword features in ideally the first paragraph, so you are sending important relevance signals to Google from the get-go.
The components of a concise yet high-converting article are:
-
First paragraph: should have the keyword in, but should also make the reader feel like they are in the right place, make them instantly trust you as an expert, and build rapport.
-
Second paragraph: touch on the main pain points you believe the reader is trying to solve when buying either of the products to trigger action, as well as the main factors the reader should consider when buying a product in this specific category.
-
Third paragraph: Make your strong value judgment on which is best, and why. But also, do not give a blanket judgment unless the product is better in every way: explain in which use cases each product is better.
The third paragraph is the most important. This is where, after building trust, you give your strong opinion, and try to make a quick sale.
Because it is very rarely a this-is-always-better situation, you need to understand every single possible audience segment visiting your page.
For example, is one vacuum better as a lightweight option, cheaper, faster, has more attachments, and compatible with more cleaning products, but the other cleans 10% more thoroughly, and is better for kitchens?
If so, make that clear. Otherwise, someone looking for a kitchen vacuum may make the wrong decision, and if you can articulate someone’s pain point as precisely as possible (wanting to clean tough kitchen stains) then you have the highest possible chance of converting them.
Common segments include:
-
Best for beginners
-
Best professional pick
-
Best budget option / premium pick
-
Best for seniors / teenagers
-
Best for Windows / Mac / Linux
Here is an example from Brian Dean:
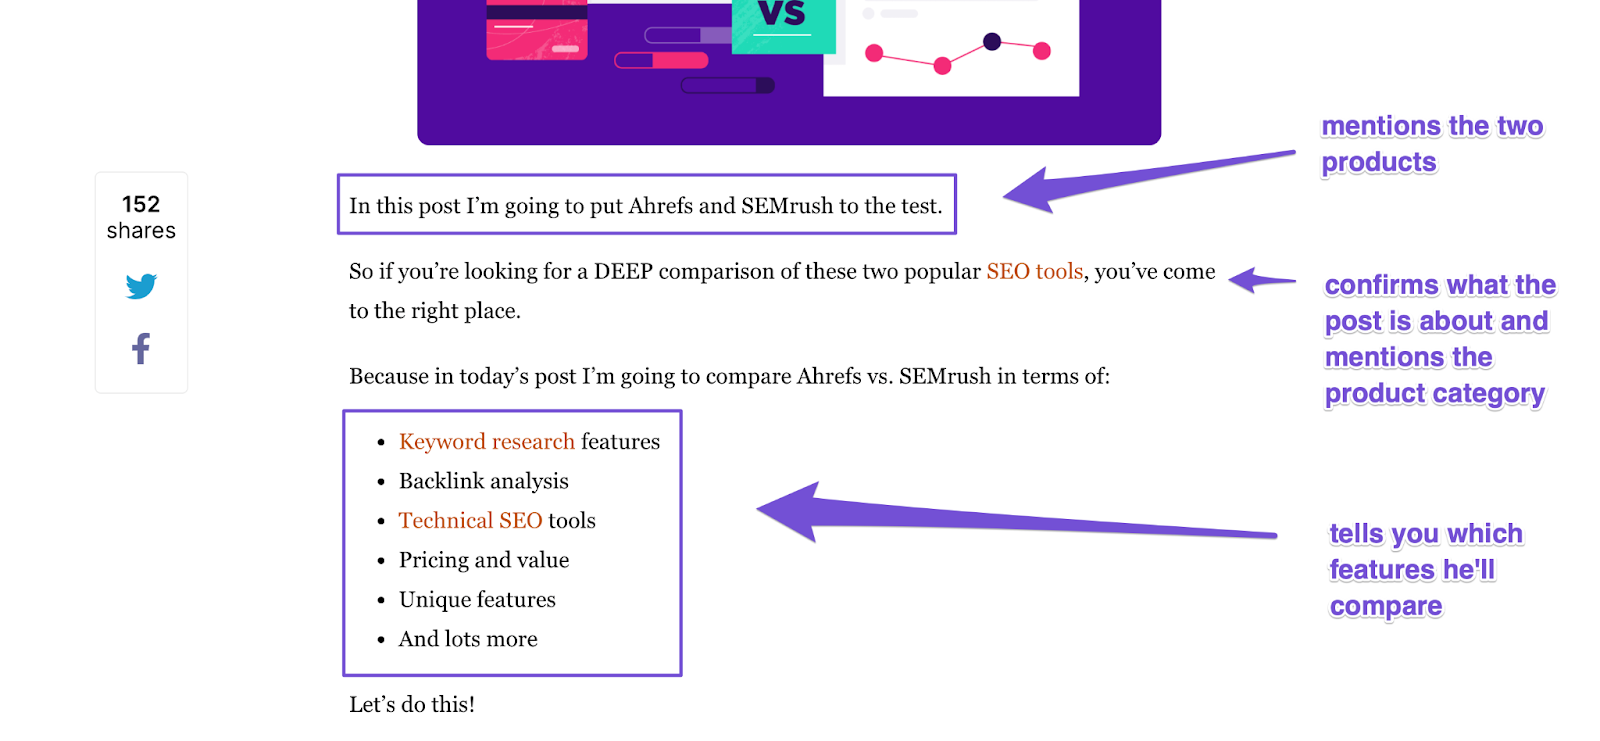
Note how Brian hits the keyword phrase “Ahrefs vs. SEMrush” in the opening before he lists which features he will compare. That is a smart SEO move.
Alternatively, you can try copywriting formulas like PAS before transitioning into the features you will compare.

Understanding the range of people likely to visit your page is key. For laptops, it is probably a mix of people who:
-
want to game
-
want to be social
-
want to design things
-
are students needing to work
And the weighting of these segments will differ based on the products being compared.
For example, low-cost laptops will have a higher proportion of students than premium companies searching for their staff. So, focus on these segments more when comparing two cheap products.
You can optionally include a pros and cons section here. If you are, you can have this as a H2 heading, with the pros and cons as H3s for each. But, I tend to put pros and cons in the call-to-action below.
The intro is where you earn the click. Everything after it is justification. Treat those first three paragraphs like conversion infrastructure, not throat-clearing.
Step #3: Call-To-Action and Pros and Cons
The call-to-action is how you get clicks to your affiliate links at the end of your product comparison intro. It is a display that literally calls the reader to action, and draws attention to the buttons where they can click to buy.
If you have written a good intro, they will be ready to buy right now. But, the best affiliate CTAs still include the key specs side-by-side, as well as which audience segments each product is best for.
Do not just include any old stat and spec. Think about which are the ones that your readers care the most about, and that will lead to a purchase.
I recommend adding the following here to maximize conversions:
-
Star ratings for social proof
-
Segmentation: “best for X”
-
Bite-size pros and cons for each
-
Comparison of the most important specs or features
-
Buy button in the most contrasting possible color
At Lasso, we built product displays specifically for this moment. Custom star ratings, segment badges, contrasting button colors, and spec fields you control per product. The display is not decoration. It is the conversion surface where intro copy meets click intent.
Here is an example of a product comparison table made in Lasso, on popular UK personal finance site Up The Gains, for an article comparing Trading 212 and eToro for investing with.

A product comparison table created using the Lasso affiliate plugin.
While it is not perfect (I would make the buttons a different, contrasting color), there is some segmentation for the “best overall” vs “best ISA option” parts (I would add more segments if there were more types of people visiting though), and a quick run-down of the pros and cons, and a star rating to encourage purchases.
This table is built in Lasso, and has driven increased clicks since the site began using the Lasso plugin. The pattern holds across sites we work with: a well-structured comparison display after the intro captures the readers who are ready to buy now, before they get lost in the long-form sections below.
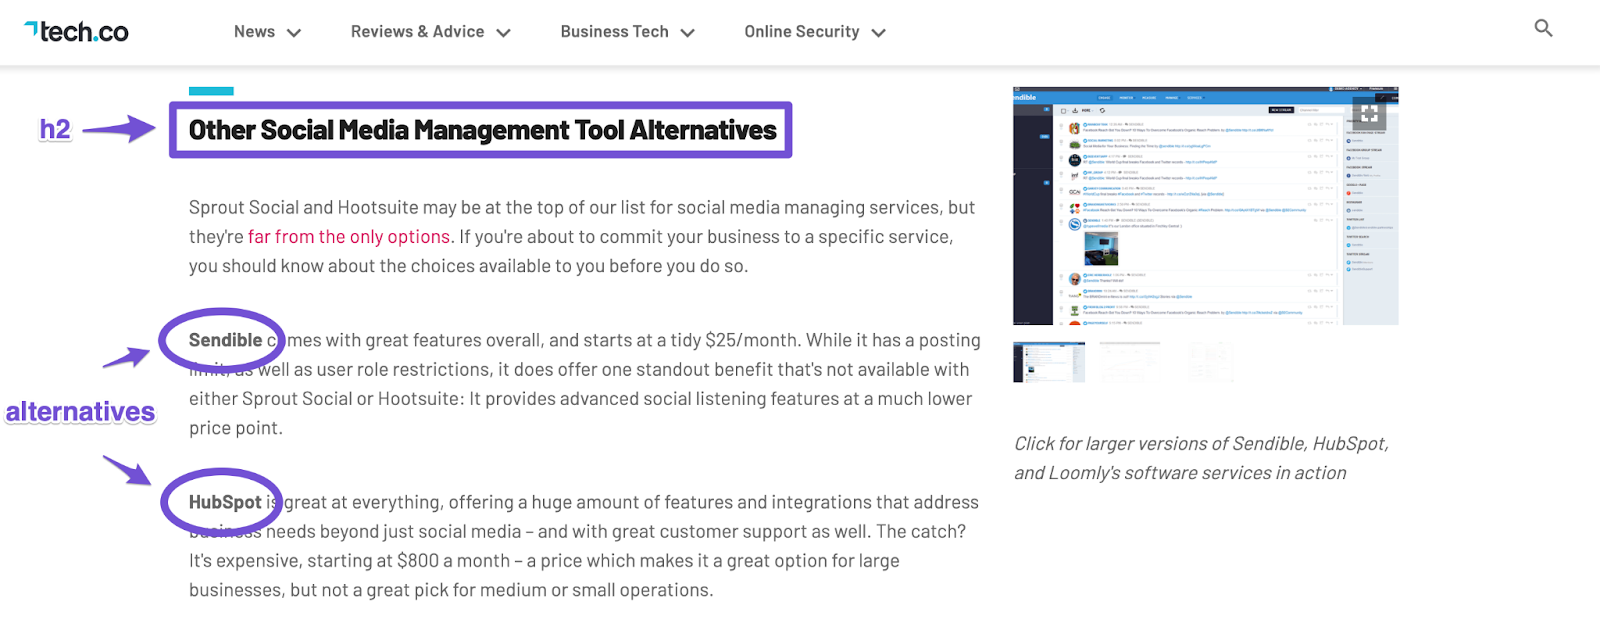
Alternatively, you can mention which product is better suited for which demographic or where they excel.
For example, the Sprout Social comparison notes that Sprout Social is best for customer service while Hootsuite is best for teams.

This further qualifies your reader because now you have added another segment mentioning who it is best for.
And here is another example using a product comparison table via TablePress:

For operators, the first CTA is not optional on comparison posts. It is the highest-ROI placement on the page. If you are not giving ready-to-buy readers a clear side-by-side display with segment labels and contrasting buttons, you are leaving clicks on the table.
Step #4: In-Depth Feature Comparison
Now it is time for the main content. If your reader did not convert and click their favorite option from the intro and call-to-action, it is now time to cover each main point of comparison in more depth.
The more high-ticket and emotional the product, the less likely the bite-size intro is to convert, and the more work you will need to do here.
So now, have a H2 heading for each main feature or spec to compare your products over. Order them based on which points are the most important, and the most likely to lead to a sale. Base that order on dynamic spec relativity: the product attributes that actually drive purchase decisions for your audience, not a generic feature list copied from the manufacturer site.
Within each section, discuss which of your compared products is best, and why.
Beyond just comparing it over the numbers (for example, 8 hours vs 4 hours battery life), explain how this affects the user’s experience, and write visual scenarios that this helps them in.
For example, in a section for “Battery Life” in a laptop comparison post, the better option has an 8-hour battery life vs 4 hours for the other product. You could then emphasize how stressful it is to run out of battery when you are working while traveling, or how comforting it is to be able to get through an entire work day without running out of charge.
The key is to put the reader in the story and have them interact with the product through your visual and active language. And if you understand the audience segments coming to this page well enough, this will maximize the chance of them taking action and buying.
You can give your readers “at a glance” features to better understand the product. These sections appeal to skimmers and the TL;DR crowd.
List the features most relevant to your product comparison that informs your reader what you plan to evaluate.
Tip: Link to your product review and include a “Sign-up” or “Get Started” CTA with your affiliate link. Here is one way you can do it:

And, for each of these sections, if you know a completely separate product that is not in this comparison, but is particularly good for this feature, you can recommend this alternative at the end.
For example, if a certain laptop has a 16-hour battery life, you can mention this for anyone who puts a premium on long-lasting charges. Use either an affiliate link to buy it, or an internal link to your in-depth product review.
This ensures you have the most helpful possible content, giving your readers complete understanding of their best option. Both out of the two products you are comparing, and any other options for particular specs or features.
Also, if a spec, like price, weight, or anything else is an easily comparable quantitative number, you can also add a mini-table to that H2 under the title, so it is easy to scan through. It also makes it easy for Google to understand.
One way to determine if the tables on your website are mobile-friendly is to use Google’s dev tools.
Here is how to do it using Chrome (if using Safari, go to Develop > Show Web Inspector from your top menu bar).
-
Open up any web page you think might have issues and right-click (or double-click your trackpad).
-
Click “Inspect”
-
Click the “Toggle device toolbar” in the ‘Inspect’ window (looks like an icon of a mobile phone appearing in front of a tablet)
-
Select “Responsive” at the top menu bar and view your page by mobile device
The in-depth sections are where you win skeptical readers. High-ticket purchases, emotional categories, and technical products all need more proof. But do not bury the verdict. Each H2 should end with a clear winner for that spec and the audience segment it serves. Comparison posts that drift into neutral territory in the body lose the trust the intro built.
For copy patterns that help you write scenario-driven spec sections, see our guide on conversion copywriting.
Step #5: Alternatives (Optional)
This is optional, and if you have included good alternatives in each of the sections before then it will not add much value, but you can also add an alternatives section at the bottom.
This is especially true if you think there is a better alternative to the two products being compared.
This should just be very short round-ups of alternative products, and what type of person you would be to prefer this over the two main products being reviewed.
Remember: if they have reached this point, then they were not ready to buy, or you did not write in a way that triggered action.
So, this is a last Hail Mary to try to find something they will like, and to get an affiliate click to a different product.
Alternatives sections also protect your economics. If neither compared product fits a reader segment, sending them to a third option you have tested keeps the session valuable. A bounce back to Google helps no one.
Step #6: The Conclusion and Final CTA
This section is where you conclude your overall verdict again, and I recommend you can add another affiliate display. Perhaps just a single display for the product you think is best overall.
If you believe you know why someone would not convert by this point, then you should also recommend a “further reading” article (or articles, if multiple reasons) that are best for the user experience, and ideally lead to some kind of conversion for you.
For example, if you are comparing two vacuum cleaners that are premium products, you could internally link to:
-
The “best budget vacuums” if they did not convert due to the high price
-
The “best alternatives” to one of the vacuums you compared
-
Or even an article on “how much does a vacuum cleaner cost” to better understand how much they should expect to pay
You provide an impartial recommendation based on your research and personal experience here.
4.8
WordPress comes out ahead thanks to unlimited flexibility, powerful themes, and awesome plugins (like
) available through the community. There’s a bit of a learning curve for new WordPress users but the platform’s raw power more than makes up for it.
-
eCommerce & SEO-friendly
-
Flexible hosting options
-
Extensive template library
-
Lacks “official” customer support team
The second CTA catches readers who needed the full spec walkthrough before committing. On Lasso-powered sites, we consistently see the conclusion display pull meaningful click share on comparison posts. Not as much as the first CTA, but enough to matter at scale across a portfolio of vs. articles.
4Bonus: Create Product Comparison Pages to Get More Search Traffic
You can create comparison pages to get more affiliate marketing search traffic and (ideally) customers.
These extra pages on your site can help wrangle additional page views and potentially convert more website visitors.
For example, we created a hub of comparison pages on our site at getlasso.co.
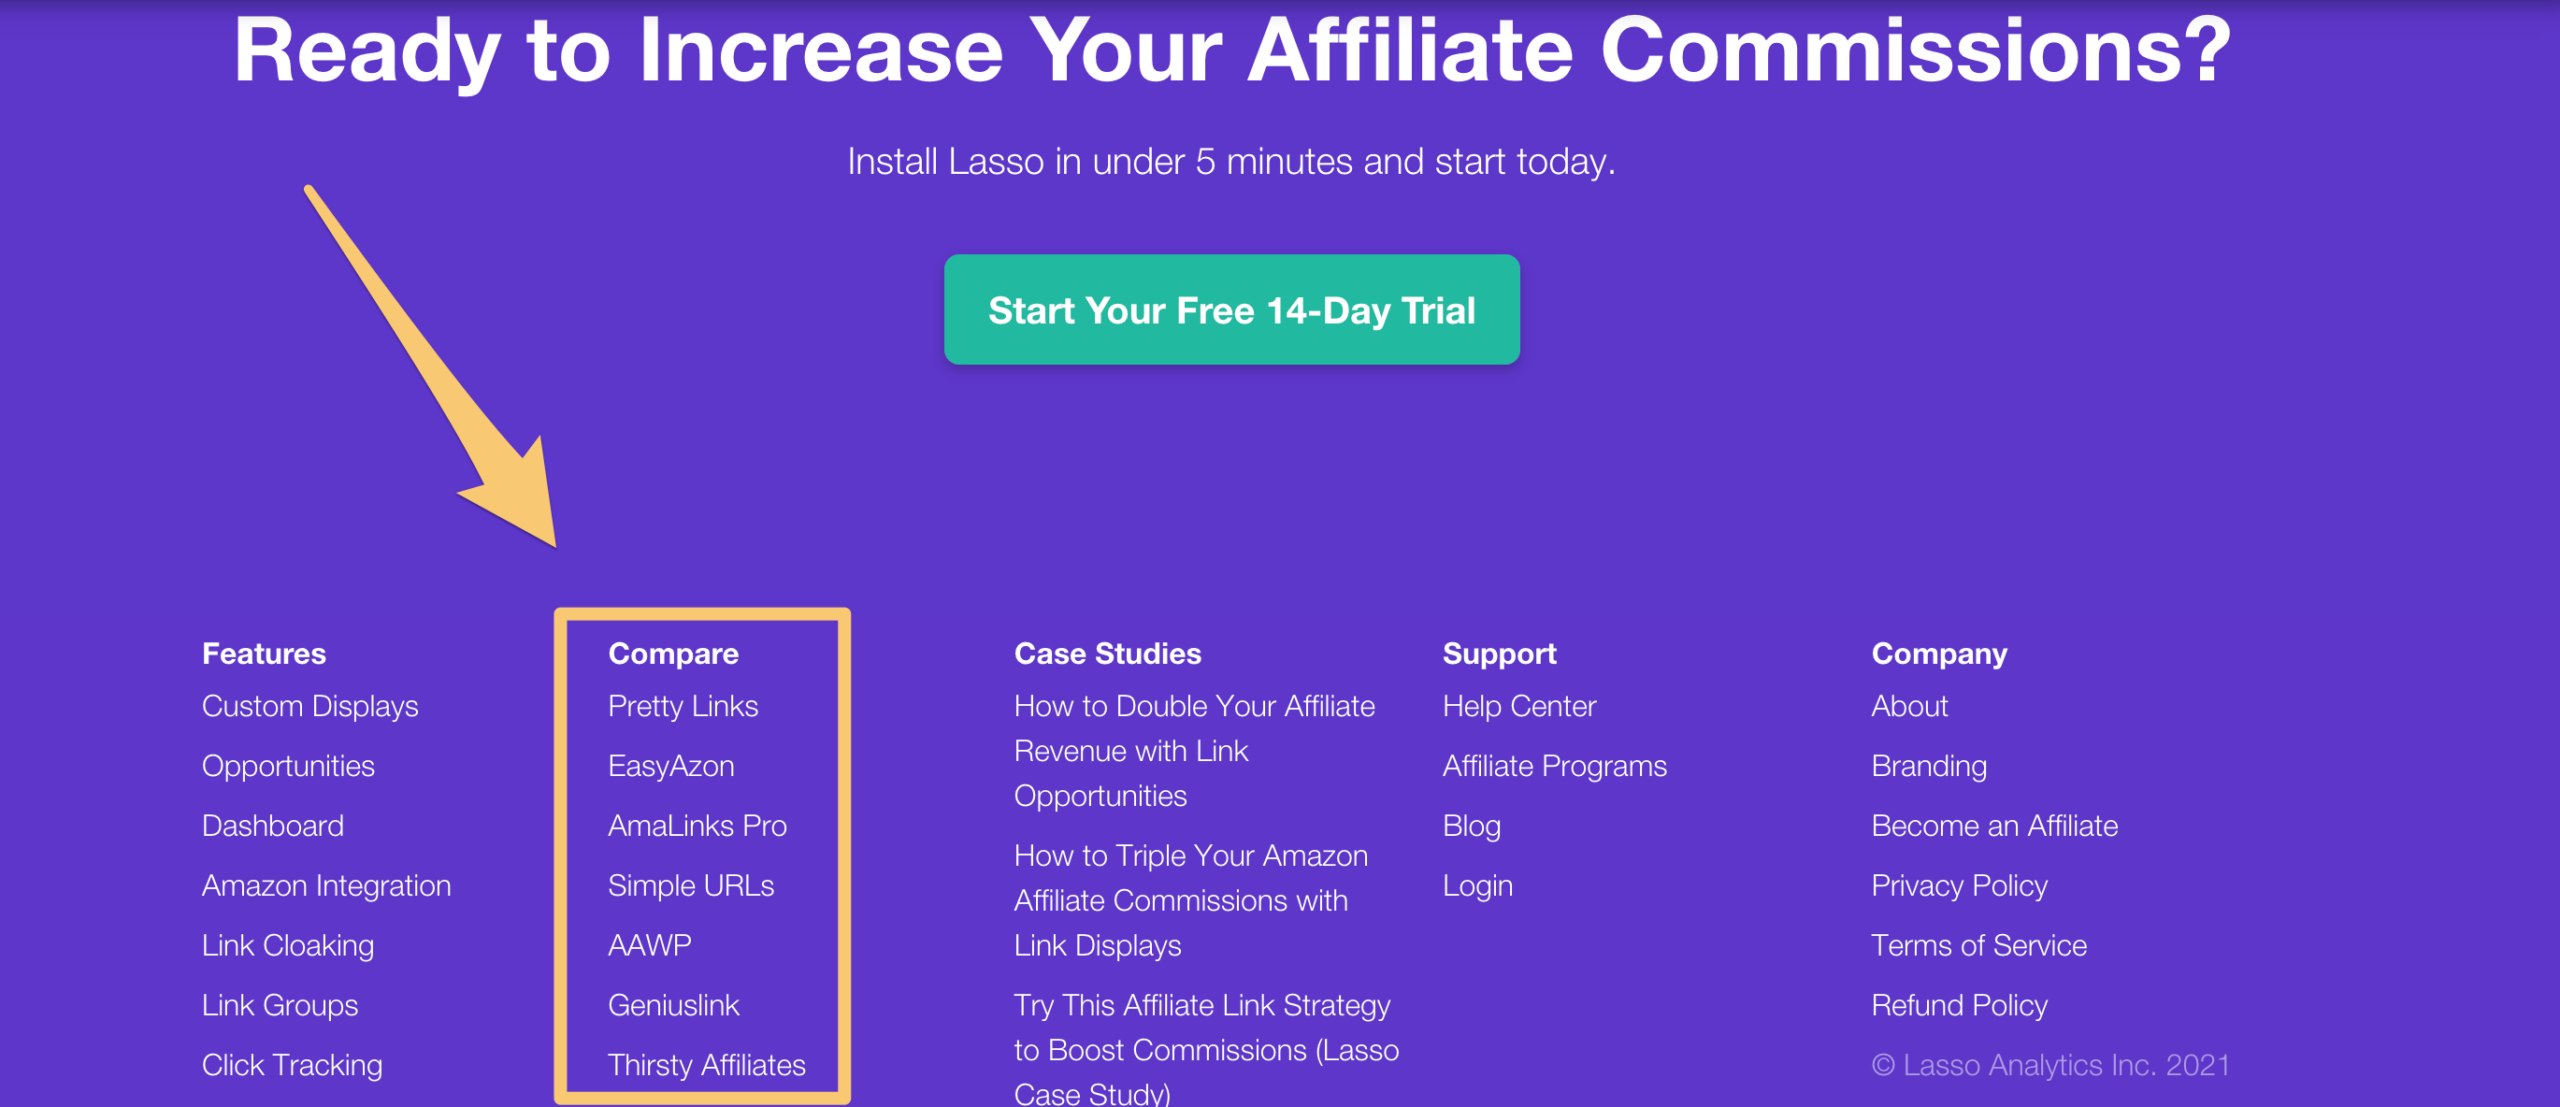
You can design your page to rank for terms like [your competitor’s name + alternatives]. For us, it was terms like “AAWP alternatives,” “Pretty Links alternatives,” and “Thirsty Affiliates alternatives” since those are some of our top competitors.
Comparison hubs compound. Each individual vs. page captures one keyword cluster. A hub page ties them together for internal linking, crawl depth, and topical authority. For operators with dozens of comparison posts, the hub is the index that helps Google understand you own the category.
5How to Research for Product Comparison Posts
Here is how I recommend you research your product comparisons to write the highest-converting article:
-
Study the products (and really test them)
-
Find the unique selling points (segmentation)
-
Understand your customers (DSR)
-
Build your comparison based on the features customers care about
1. Study the Products
I highly recommend you really do test the products you are comparing. Not only will you really understand the benefits and cons of each, and the specifics based on your hands-on review, but you will also have great images that increase conversions on affiliate content.
Images build trust with the reader, pulling them directly into the story as you show the product in use.
Beyond this, you can further understand the products via:
-
Reddit: looking for feedback and product discussions
-
Quora: look for questions on the products, and answers from real customers
-
Amazon reviews: you can even filter these by certain queries, which is key for understanding the unique selling points in the next step.
-
Niche forums: find forums dedicated to the product niche and see what these experts think.
Hands-on testing is not always possible, especially on enterprise software or high-ticket hardware. When you cannot test, be explicit about your research method. Pull quotes from verified buyers. Screenshot the interface. Google rewards first-hand experience signals, and readers reward honesty about what you did and did not test yourself.
2. Find the Unique Selling Points
Once you have read up on all the information about each, you should understand the unique selling points.
It is essential to find these and keep them in mind from the beginning, as you will base your entire product comparison review on these.
Unique selling points are the raw material for segmentation. “Better battery” is a spec. “Lasts a full workday without hunting for an outlet in airport terminals” is a USP tied to a traveler segment. Your comparison structure should emerge from USPs, not from a manufacturer’s feature list.
3. Understand Your Customers
Use dynamic spec relativity, and your understanding of your customers, to prioritize which features to discuss most prominently. This is key to maximizing your sales.
If you know your customers, you will know which main segments they fall into, and you can promote each product for each segment most clearly, or offer alternatives for any segments that the two (or more) products being compared do not fall into.
Dynamic spec relativity means the same spec carries different weight for different buyers. Price matters more to a student than to a small business owner evaluating team software. Integration depth matters more to a developer than to a solo marketer. Order your H2 sections by spec importance for your primary audience, not by alphabetical feature names.
4. Build Your Comparison Based on the Features Customers Care About
And based on steps 1-3, you can write your product comparison with these frameworks in mind.
Research is not a preamble. It is the architecture. The segments you identify in step 3 become your intro verdict, your CTA badges, and your H2 order in step 4. Skip the research and you end up with a comparison that reads like a press release. Do the research and you get a page that reads like advice from someone who has actually made the decision.
6Additional Tips for Writing Product Comparisons That Convert
1. SEO Basics
Make sure you have the keyword in title, H1, H2, first paragraph, and last paragraph.
Avoid stuffing the keyword in every H2 heading (for example, instead of “X vs Y: Speed”, just write “Speed”), and avoid repeating it in every image’s alt text, as you will end up over-optimizing.
Comparison keywords have a predictable structure. Google expects both product names, the vs. pattern, and spec-level headings. Hit the main keyword in the high-signal placements. Let the body headings stay clean and scannable.
2. Check the Search Intent for How Many Products to Compare
Some X vs Y keywords actually return X vs Y vs Z articles, where a third product is compared. If these articles are ranking above the X vs Y articles, this is a sign you should do the same.
It is essential to search your keyword and see what Google returns as the rankings articles. This shows you what Google thinks the correct search intent of the article is.
But, as a general maximum, avoid more than 4 products in a product comparison article. And even 4 is a lot, I have only ever compared 3 before.
Any more than 4 products compared and you will reduce affiliate link clicks with decision paralysis from too many options, and your product comparison tables will look less sleek and be more difficult to scan.
SERP reconnaissance takes ten minutes and prevents structural mistakes. If the top three results all compare three products, a two-product article may still rank, but you are fighting intent. Match the format the SERP rewards, then out-execute on segmentation and displays.
3. Give Strong Value Judgments
Do not just generically say both products are good overall, or they are good for everything. Say where one is amazing, and one is terrible.
People need to have confidence that they are picking the best product for them, and if you do not clearly show where one is ideal for them, and one is absolutely not the right option, then you will not give them this confidence.
Neutral comparisons feel safe to write. They do not convert. Readers came for a decision. Give them one per segment, then back it up with evidence. “It depends” is only useful when you immediately follow it with “it depends on whether you need X or Y, and here is which product wins each case.”
4. Show Your Real Product Tests
Add images showing your real product tests, and use the first person wherever possible. Google wants to see real reviews, and unique images as well as using “I” gives Google positive signals that you are to be trusted and ranked higher.
Stock photos and manufacturer renders signal commodity content. Photos of the product on your desk, in your kitchen, or on your screen signal experience. That trust transfers directly to click-through on affiliate displays.
5. Reach Out to the Companies
If you say nice things about a product or company during your product comparison review, you can reach out to the company and see if they will link to you, or at least share on social media.
If you have not hands-on tested the product, they may also offer to send it to you so you can add images that improve conversion rates, or send you another product in their range that you can review separately.
A comparison post that ranks and converts is a marketing asset for the winning vendor. Share it. Some will amplify it. Others will send product. Both outcomes improve your next comparison.
7FAQs
What information should be included in a product comparison page?
You should include the information that is most important to the customer, and most likely to lead to them buying the product. Prioritize the specs, features, or any other information that leads to sales, based on your understanding of the customer. This most likely includes price, and other main specs, but consider other lesser-known comparison points that are key to the buying process.
How do I narrow down my options when comparing multiple products on a comparison page?
Your keyword research should show up which products people are searching for to compare, as well as knowledge of your niche to understand the most compared products.
What are some common mistakes to avoid when creating a product comparison page?
Make sure you clearly segment the products you are comparing, so that each audience segment that visits the page is shown which option is best for them. Also, make sure to clearly show which product is not for a certain segment, not just who it is good for. This will earn your readers’ trust.
8Last Words
Product comparisons are low-competition, high-converting content. That combination makes them ideal for smaller affiliate sites and for e-commerce brands building decision-stage pages. The formula is not complicated. Strong title, segmented intro with an early verdict, a side-by-side display for ready buyers, spec sections ordered by dynamic spec relativity, optional alternatives, and a conclusion that restates the call.
The operators who win with comparison content treat each vs. post as conversion infrastructure, not a word count exercise. They test products when they can, segment aggressively, and place displays where buyer intent peaks.
If you already have comparison posts ranking, start with what is under-monetized. Run an Opportunities Scan on your published content. Most operators find product mentions sitting without optimized displays in URLs that already get traffic. Fixing those placements is often the fastest path to higher revenue without writing a single new article.
Jamie I.F.
Jamie heads up marketing at Lasso, runs a portfolio of niche sites, and tweets a lot about affiliate marketing and SEO.